Making bread at home is not as hard as it may seem. In fact, with the right ingredients and a little patience, you can enjoy fresh, homemade bread right out of the oven. I’ve made my fair share of bread, and I’m here to share what I’ve learned along the way. Whether you’re a beginner or have tried baking before, this guide will help you feel confident about baking your own bread at home.
Why Make Bread at Home?
You might be wondering, “Why bother making bread at home when I can buy it from the store?” Well, there are plenty of good reasons to give it a try. For one, homemade bread tastes so much better than store-bought! It’s fresh, warm, and you can make it to your taste. You can control exactly what goes into it, and that’s great if you have food sensitivities or just want to avoid preservatives and other chemicals. Plus, it’s a fun and satisfying process!
What You Need to Get Started
Before you start baking bread, you’ll need a few basic ingredients and tools. Don’t worry! You don’t need anything fancy, and you probably already have most of these items in your kitchen.
Ingredients:
- Flour: This is the main ingredient. You can use all-purpose flour or whole wheat flour, depending on the kind of bread you want to make.
- Yeast: Yeast is what makes your bread rise. It’s the secret to light, fluffy bread. There are two main types of yeast: active dry yeast and instant yeast. I prefer instant yeast because it’s easier to work with, but both types work fine.
- Water: Warm water is used to activate the yeast and help it rise.
- Salt: Salt adds flavor and helps control the yeast’s activity.
- Sugar or Honey: This is optional, but it helps feed the yeast and gives your bread a nice flavor.
Tools:
- A large mixing bowl
- A measuring cup
- A spoon or spatula
- A baking sheet or bread pan
- A clean kitchen towel
- An oven
See also: Everything You Need to Know About Making Bread at Home
Step-by-Step Guide to Making Bread
Here’s a simple, step-by-step guide to making bread from scratch. I’ve broken it down so you can follow along easily.
1. Mix the Ingredients
In a large mixing bowl, combine 3 cups of flour, 1 tablespoon of sugar (or honey), and 1 teaspoon of salt. If you’re using active dry yeast, you’ll need to activate it first. To do this, sprinkle the yeast over 1 cup of warm water (not too hot, just about 100°F) and let it sit for about 5 minutes. If you’re using instant yeast, you can skip this step and add it directly to the flour mixture.
Now, if you’re making bread with baking soda instead of yeast, the process is a little different. Instead of waiting for the dough to rise, baking soda works by reacting with an acid (like buttermilk or vinegar) to create bubbles that help the dough rise. You can follow the same basic mixing steps, but you would add 1 teaspoon of baking soda to the dry ingredients and include an acidic liquid in your recipe.
Once your yeast or baking soda mixture is ready, pour it into the flour mixture. Stir everything together until you have a sticky dough.
2. Knead the Dough
Now comes the fun part – kneading! Lightly flour your countertop and turn the dough out onto it. Use your hands to knead the dough by folding it in half, pressing down, and turning it. Knead for about 8-10 minutes, or until the dough becomes smooth and elastic. You’ll know it’s ready when it doesn’t stick to your hands anymore.
If you don’t want to knead by hand, you can use a stand mixer with a dough hook attachment to do the hard work for you!
3. Let the Dough Rise
Once you’ve kneaded the dough, place it back into the mixing bowl and cover it with a clean kitchen towel. Set it in a warm place (like near a window or on top of the stove) for about 1 to 1 ½ hours, or until the dough doubles in size. This is the proofing process, where the yeast does its magic and makes the dough rise.
4. Shape the Dough
After the dough has risen, punch it down to release the air bubbles. Then, shape it into a loaf. You can either form a round shape or shape it into a long loaf. If you want to make rolls, divide the dough into smaller pieces and shape each into a ball.
5. Second Rise
Place the shaped dough onto a greased baking sheet or into a greased bread pan. Cover it again with the towel and let it rise for another 30 minutes to 1 hour. This second rise ensures the bread becomes light and fluffy.
6. Bake the Bread
Preheat your oven to 375°F (190°C). When the dough has finished rising, it’s time to bake! Place the dough in the oven and bake for 25-30 minutes, or until the top is golden brown. To check if it’s done, tap the bottom of the loaf. If it sounds hollow, the bread is ready.
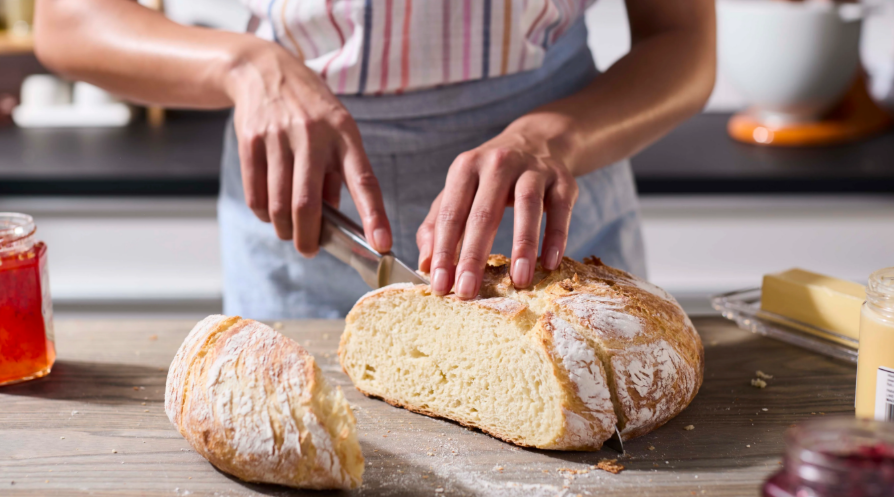
Once baked, let the bread cool on a wire rack before slicing into it. The smell of fresh bread is absolutely amazing!
What to Do if You Run Out of Ingredients
Sometimes, things don’t go according to plan, and you might find yourself missing an ingredient. Maybe you’re out of baking soda or yeast, and you don’t want to run to the store. That’s when knowing substitutes comes in handy.
For example, if you run out of baking soda (sometimes used in other bread recipes or as a quick fix for other kitchen problems), there are plenty of simple substitutes you can use. I’ve found that vinegar, lemon juice, or even baking powder can stand in for baking soda in a pinch. If you’re interested in learning more about baking soda substitutes, check out this helpful article:.
Tips for Perfect Bread Every Time
- Use the right water temperature: Too hot, and it will kill the yeast. Too cold, and it won’t activate the yeast. Aim for about 100°F.
- Be patient with the rising times: Don’t rush the rising process. The longer you let the dough rise, the better the flavor will be.
- Experiment with flavors: Once you’ve mastered the basic recipe, feel free to add herbs, garlic, or even cheese to your dough for extra flavor.
- Don’t forget to flour your hands: If the dough is sticky, flour your hands to prevent it from sticking to you.
How to Fix Common Baking Issues
Sometimes, things don’t turn out as expected. If your bread is dense, it could be that you didn’t knead it enough or the dough didn’t rise properly. If it’s too dry, you may have added too much flour. Don’t worry! With a little practice, you’ll know just what to do next time. Just make sure you follow all the steps I talked about and try again. Practice makes perfect, after all.
Making bread at home is a fun and rewarding process. With just a few simple ingredients, you can bake fresh bread that tastes better than anything you’ll find at the store. Don’t be afraid to experiment and make the recipe your own. And if you ever find yourself out of baking ingredients, there are plenty of great substitutes that can save the day. I hope this guide helps you feel confident in your bread-making journey!